Home ⁄ 2018 ⁄ January

Making Swag Kind Window Drapes

Swag design drapes paired with attractive curtain rods add beauty to windows. A drape therapy assists and is effective along with blinds or shades body a stylish see. Although time will be saved by utilizing a sewing-machine, you may make the swag — a amount of fabric with finished edges. A light-weight material, including rayon or silk, will produce a drape that is efficient .

Calculate the width of the window using a tape calculate. Measure the amount of the window and double it. Use these figures to decide the amount of the drape along with the material yardage you will require for lining and the swag.

Cut lining and the cloth to the established size plus 1-inch. Use the width of the material bolt.

With proper sides of the materials facing each other place the the liner material along with the swag material. Pin the edges every 2″, with the pins. Sew the two materials together 1/4 inch in the edge having a straight-stitch, using a needle and thread or a sewing-machine; abandon a 6 inch size unsewn.

Turn the swag to the side that is correct through the 6 inch opening. Hand-sew the opening closed using thread and a needle. Press the edges that are swag flat with the iron on an ironing board. Turn the iron to an appropriate environment for the two materials utilized.

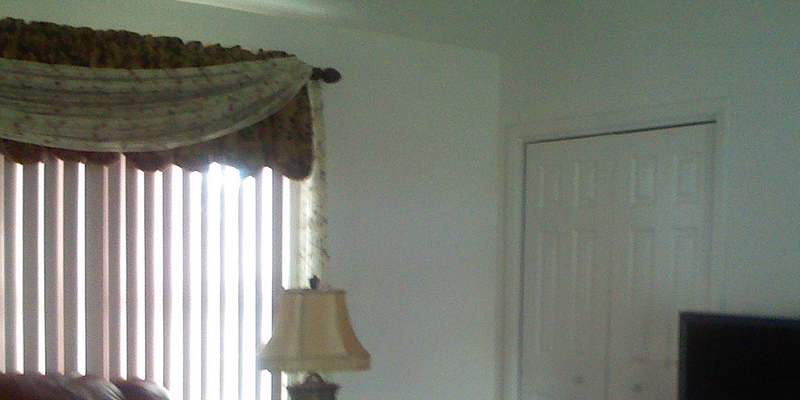
Attach the rod that is ornamental over the window using a screwdriver. Pull the swag up through the rear of the fringe of of the rod. Drape the swag on the very front of the rod and through the proper edge of the rod. Carefully adjust the result you wish to be achieved by the swag.

See related

How to Water a Jalapeno

Lots of other pepper types and jalapenos develop effortlessly with a place that is sunny, the sunshine and well-drained soil. They need regular waterings, particularly during droughts and hot weather. A soaker hose or a drip irrigation method are perfect for watering peppers although gardeners with one or two crops will possibly find it simplest to water them yourself. Soaker hoses or drip irrigation, which lie at the the very top of the soil, provide water right to the plant and soil roots, rather than adding to to fungal illnesses and spraying water.

Moisten the soil before planting seeds that are jalapeno.

Keep the soil moist to enable the seeds to germinate. Watering the seeds a tiny bit each day will guarantee they become saturated with water or don’t dry up.

Water the plants frequently, giving at least 2″ of water per week during dry climate to them. By sticking your finger check the soil moisture it feels dry an inch under the the area.

Water less often the seeds develop into bigger crops with roots that are deeper given that they are going to be in a position to get dampness from down in the soil without as numerous waterings. However, it’s still essential to keep the soil moist. Be particularly vigilant about watering when the crops have peppers expanding to them.

See related

The best way to Compost Seaweed

While several gardeners compost vegetable trimmings, grass clippings, leaves and organic matter gathered, the ocean offers its bounty of vegetation that is compostable: sea-weed. Seaweed is normally full of micronutrients and macronutrients, including nitrogen, and content and its own alginate increases the capacity to absorb and hold moisture and nutrients of your backyard soil. While refreshing sea-weed can be spread by you in your backyard as a mulch, enabling it to compost will accelerate your crops’ capacity to use the nutritional elements within the seaweed.

Walk the beach and gather any seaweed which has washed ashore, placing it right into a bag or a bucket. Avoid harvesting sea-weed straight from reefs or rocks or from the ocean, that might be unlawful in your region.

Rinse the sea-weed with water that is fresh. This removes any particles, including sand and rocks, while eliminating salt, which some backyard crops don’t tolerate.

Shred or chop the sea-weed up in to 1- or 2 inch-long items. Sea-weed that is left complete can simply take around six months to compost while sea weed requires only several weeks to decompose.

Combine the moist, sea weed that is chopped with the equal quantity of dry matter like leaves that are dried.

Pile the compost materials that is raw in a shady location of your lawn.

Turn the pile two months when the pile is created by you. Use a pitch fork so that what used to be to the the top of pile is blended to the center of the pile or spade to fluff up the matter.

Collect the compost two months. By now, the sea-weed must have decomposed in to wealthy, crumbly issue that was dark as you are able to mix in to your backyard s Oil to aid feed your crops.

See related

The best way to Allow Flooring

Because wood contracts and expands with temperature and humidity, it is critical to before installing it to acclimate your hard-wood flooring. Its motion is minimized by allowing it time to come with all the space problems after installation, which could create an impact. It could shrink, with gaps forming involving the boards in the event the wood must adjust after installation. It could expand, as they push against each other, as well as the boards will cup. Acclimate the wood and offer a moisture barrier on the sub-floor to guarantee a professional-quality flooring installation.

Unpack the new flooring and distribute it around the area. It is best if air can circulate on all sides of the boards, thus should you not have space to stand them spot them on the ground on lengths of 2- . Stack the boards, if required, by putting 2-by-2s between levels.

Consult the manufacturer’s strategies for for the optimum quantity of time to depart the boards before you start installation. A typical recommendation is 72 hrs, but this may vary based on the kind of wood that they are created as well as the widths of the boards. Wide-plank flooring may require up to 2 weeks.

Maintain regular conditions in the area while the flooring is acclimating. You also have air conditioning and when it’s summer, operate the AC. Similarly, change on the heat whether it’s it is cold temperatures.

See related

The best way to Cap an Un Finished Tile Backsplash

In the event the back splash tiles don’t get together with the cupboards or an adjoining wall above them, the edge of the tile might display and detract from your design. Because of this, end trim parts are usually employed to help produce a style that was uniform using a finished look. Tiles will be the most frequently employed in this region, but a cap molding in a shade and end can do the work too in case a bullnose isn’t accessible for the tile being installed.

Where the cap molding is to be installed, measure the location and mark an area of the same dimensions on the floor off or counter close by.

Lay out the molding where the items will require to be cut to to suit the installation to decide. Place the parts that are cut in the ends of rows to help conceal them or in corners.

Cut the bits of molding to to match the installation on a tile wet saw. Before installing double check their match the remaining installation lay out.

Spread a small quantity of mortar on the wall where you’re installing the cap moldings. When this region is a a good match as well as tiny, distribute the mortar onto the backs of the moldings as opposed to the wall, to get a cleaner work.

Press the cap moldings to the mortar on the wall-in the routine previously established. Allow the mortar to dry over-night.

By spreading the grout within the installation using a float grout the moldings combined with the remaining backsplash. Let the grout established up for 1-0 minutes, then clear the excessive using a moist sponge a-way. Let the backsplash dry undisturbed overnight.

See related

The best way to Propagate Gaura

Gaura lindheimeri, generally called butterfly gaura or the flower, provides interest to the backyard using its huge flowers that seem nearly out of left field on slender, grass-like stalks. This perennial tolerates a broad array of soil problems and reaches about 36-inches tall, from fertile and well-draining all of the way to acidic and dry. Once gaura is planted, it can’t be moved because it develops long tap-roots. By starting seeds in a managed atmosphere, the the easiest method to is.

The peat pots using a peat-based seed-starting medium, making certain to wet it carefully. Allow them to sit overnight to drain.

Create a indention to the middle of the pots, no over 1 1/16-inch-deep. Drop gaura seeds that are several and cover with all the medium that is remaining. Place a zip-top bag over each pot to make sure that the humidity will will remain high till after the seedlings emerge, about 2 weeks at 70 degrees Fahrenheit. There isn’t any need for warmth.

Check your gaura seeds everyday to ensure they don’t dry. Carefully mist the seeds using a spray bottle. Carry on to water together with the spray bottle till they produce their first two leaves once seedlings arise. Thin the seedlings in each pot to the finest one or two and carry on to water frequently. Begin hardening off the seedlings in about 6 months.

See related

The best way to Grow Opuntia Cactus

Prickly pear cacti in the genus Opuntia are widely-distributed in the Environment Zones of Sunset 8, 9 and 12. The prickly-pear which is native to Mexico and yields edible pads and fruits is the Indian fig Opuntia (Opuntia ficus indica). With respect to the species, the 3/4 inch-thick, prickly-pear pads that are oblong or elliptical increase 9″ wide and from 4-to 16-inches long. Most species that is cultivated are spineless or include 1-inch- long spines. They require a sunny place to prosper.

Propagation by Pads

Remove a prickly-pear pad which is at least six months old along with your knife.

Sit the pad up right while the wound is formed on by a callous, therefore it’s going to not curl. In summer, a callous will type on the cut-in two or one months. This may take. To prevent rot, permit more time-rather than less.

Dip the remedied pad in a Bordeaux combination to safeguard it. By incorporating 3 1/3 tablespoons of copper sulfate and 10 tablespoons of dry hydrated, available at most centers, to 1-gallon of water., it’s possible for you to make a quantity of Bordeaux combination ideal for house gardening

Plant the pad up right about 1-inch deep in pumice and 1 part soil or a combination of of 1 part sand. Use the pad to be anchored by rocks and keep it up right. Don’t water it. Prickly pear pads include moisture. It might rot in the event that you water a pad now.

When roots have formed, water the pad after 30 days, also it’s going to stand upright on it’s own. Don’t water until the soil is dry.

Water and Fertilizer

Water only if the soil is dry. When prickly-pear cacti are dormant only enough to keep the pads and make certain they get lots of sunlight.

Apply a balanced fertilizer monthly in their spring to drop period that is developing. A well-balanced fertilizer includes equal quantities by weight of potassium, phosphorus and nitrogen.

Fertilize using a large-nitro Gen fertilizer in the event that you want greater pads.

Fertilize in the event you want your cacti to generate fruits and flowers using a product that doesn’t contain nitrogen. When the crops are dormant, apply month-to-month even throughout the cold temperatures.

Harvesting

Carefully slice the the pads that are edible from mid-morning to mid afternoon when they’ve low-acid content. Each yr a proven plant might produce as much as six harvests of 2 to 4-0 pads.

So they are going to yield excellent remove allbut eight to 16 blooms -sized fruits. A pad that is mature may possibly develop to 3 blooms.

Twist the fruits when their glochids falloff, an indication they support the the optimum a-Mount of sugar and are ripe. Glochids are yellow or red clusters of small spines that are barbed. To a void harming the pad, don’t pull off the good fresh fruit.

See related

The best way to Repot African Mask Plants

Alocasia amazonica is a plant generally called jewel Alocasia mask, Alocasia alligator and Alocasia poly. Many people also call it an elephant’s ear plant, which is correct. Its dark-green leaves are arrow shaped with pronounced pale green to silvery-white veining. The crops grow to between 2 and 4-feet tall with leaves that are 2-feet long by 1 foot wide. Repot these crops when the container is filled by the roots or when the mix reduces, becomes soggy and drains rapidly.

Look for a fresh container with drain holes in the bottom that’s no over 1 one to two inches bigger in diameter than the one the plant is developing in presently. Use a container of the same dimension or the container if you’re only changing the mix. Fill a gallon jug or two times before re-potting the mask plant to enable the chlorine to dissipate. Keep the water.

Use a mix developed for ferns or bromeliads. It will contain sand or soil, peat, bark and perlite. Purchase the components individually in the local nursery if preferred, and blend them yourself. Use 40% bark/ charcoal blend, 20-percent peat, 10% perlite and 30% packaged soil.

Set the plant on at the the top of newspapers spread on the ground or a flat work surface area. Tip container and the plant on its side. Grasp the plant in the bottom of the stems and pull it from the container. Work the potting mix or rhizome yourself. When it is being reused clean all the potting mix from the container.

Pour clean potting mix to the base of the container into a depth of approximately 2″. Place the mask plant to the container. Make sure that the very top of the potting combine that is new is going to be a T the sam-e le Vel on the plant stems as it once was. Allow 1/2 to 1 inch of area between the top of the container. the best of the potting combine and Remove the plant if essential, and alter the depth of the s Oil in the bottom.

Hold the plant in the container in the bottom of the stems to keep it le Vel and straight while filling the container. Pour the remaining potting blend into the container throughout roots and the corm. Set the recently re-potted plant in the tub or exterior in a shady place. Pour the RoomTemperature water over the combine until it runs from the bottom of the container. After the extra water finishes draining move the plant again back to its room in-doors.

See related

Varieties of Okra

You may not associate okra (Abelmoschus esculentus), the mainstay of gumbo, using the hibiscus family. But this vegetable’s showy burgundyandlemon yellow flowers give a clue to the hibiscus family affiliation. Originally from Ethiopia, the plant becomes very strong in the south-eastern U.S. as the flowers mature into delicious, tender pods. A selection that is dominating does take into account okra seed revenue, but nonetheless, others can be tried by you in the event that there is a high- quick or altitude growing season backyard — or just want to develop different things. Do attempt to get a sunny place with this tender.

Clemson Spineless

A common okra plant at 4-feet or somewhat more in mature peak, Clemson Spineless is the reason the lion’s reveal of business and house planting in California — where it’s grown commercially in Kings and Tulare counties — and else where. Slightly pods that are ridged can be found in in 5-6 times. Seeds are open-pollinated as well as the crops are self-pollinating, meaning that ensuing seeds planted and may be saved, and ought to grow accurate to the parent. “Spineless” refers to the relative absence of spines on the pods and branches. Seed expenses are low given the extensive use of Clemson Spineless in the U.S. and internationally and the simplicity of making non-hybrid seed, notes the reference text “Genetic Resources, Chromosome Engineering, and Crop Improvement.”

Other Heirlooms

Star of David open-pollinated okra grows or more or 7-feet tall, with purplish pods prepared for harvest in 60 to 75 times and leaves. Several spines are noted by the University of Tennessee Institute of Agriculture on the top or apex end of the pods, particularly on Star of David okra. Other heirlooms contain Emerald, usually rated in-field trials and with spherical easy pods, Stewart’s Zeebest with spherical unribbed pods, Vidrines Midget Cow Horn with 3-foot-tall crops, and Hill Country Heirloom Red, with fat pods.

Hybrids

Hybrids contain Green Greatest, Annie Oakley II, Annie Oakley and 1285. For those who have cool-weather, give Annie Oakley an attempt, as this compact plant is more tolerant of a minor chill, writes Barbara Perry Lawton in “Hibiscus: Hardy and Tropical Plants for the Garden.”

Specialty Okra

Chant pointed pods offers lengthy and matures in 55 times. Red -podded okra varieties contain Red Velvet with rhubarb- little spines in the pod foundation and coloured pods. Open-pollinated Burgundy matures at 49 to 60-days. Red -pod okras include Hill Nation Red Bowling Red and Jing Orange. For okra that is over-size, take to Perkins Mammoth Extended Pod, expanding to a peak of 6 to 10-feet and maturing in 60-days, or Louisiana, with 16-inch-lengthy pods.

See related